

I have wanted to try and bake croissants for a long time, but I have held off since it is time consuming, and a bit intimidating. I thought I was going to try a couple of times before I was successful, but this is the first time I made these, and they turned out so good.
I looked at different recipes, and decided I was going to try the one from Tartine Bread, the book from Chad Robertson with recipes from his Tartine Bakery. I got the book last year, and while I have browsed it many times, I had yet to try baking anything from the book. It is a gorgeous book, and I do recommend it, Robertson has very interesting, almost spiritual, approach to baking.
These croissants are made with a bit of sourdough too, which was intriguing, but I have tasted the ones from Tartine the last time I was in San Francisco, and they were delicious. There was one problem though, and that was my sour dough had been somewhat neglected. I discarded most of it, fed it again, and it revived. I think I would ideally had an extra day to revive it, but there was still yeast activity in there. I do in general make it and maintain it a little different than the sourdough in the book, but it should not be an issue however you choose to handle your sour dough.
Ingredients: (original recipe from Tartine Bread (book 1))
Day 1, leaven:
- 1 tbsp sour dough
- 220 g all purpose flour
- 220 ml water
Day 1, poolish:
- 200 g all purpose flour
- 200 ml water
- 3 g active dry yeast
Day 2:
- 450 ml whole milk, at room temperature
- 300 g leaven (from above)
- 400 g polish (from above)
- 1 kg bread flour
- 28 g salt
- 85 g sugar
- 10 g active dry yeast
- 400 g unsalted butter, cold
- 1/2 cup all purpose flour
- 1 egg (for egg ash)
- 1 tbsp heavy cream (for egg wash)
Method:
Day 1:
1. Make the poolish by mixing the flour, water and yeast in a bowl. Cover and let stand overnight in the refrigerator.
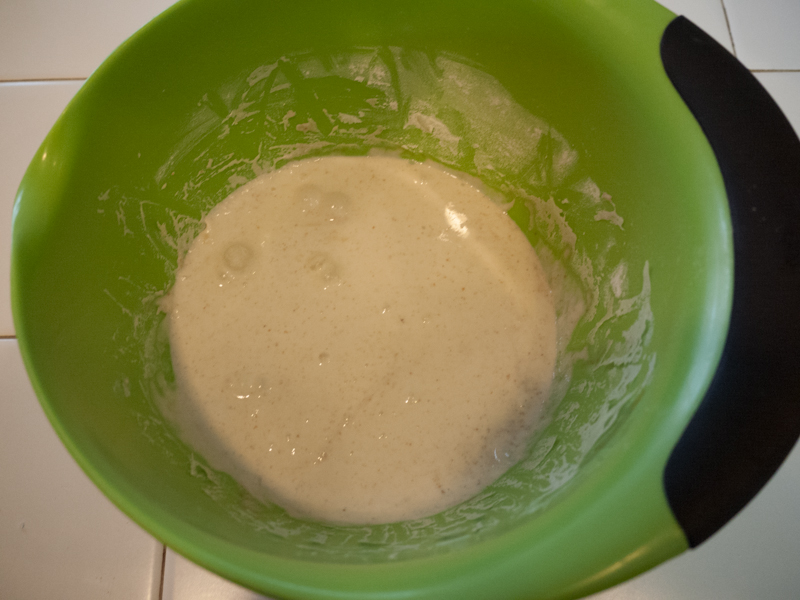
2. Place your sour dough in a different bowl and add the flour and water. Cover and let stand at a cool room temperature overnight.

Day 2:
3. Mix the milk, leaven and poolish in a large bowl the next day. Save the remaining leaven as your sour dough starter, if desired.

4. Add the flour, salt, sugar and yeast, and mix until a dough begins to form. Let rest for 25-40 minutes.


5. Fold the dough on top of itself, like a letter, and transfer to a bowl or proofing box and cover.
6. Let the dough rise for 1.5 hours, where every 30 minutes you pull the bottom of the dough to the top, stretching and turning it over in the bowl. The entire dough should be stretched each time. The theory here is work the gluten without a lot of kneading.

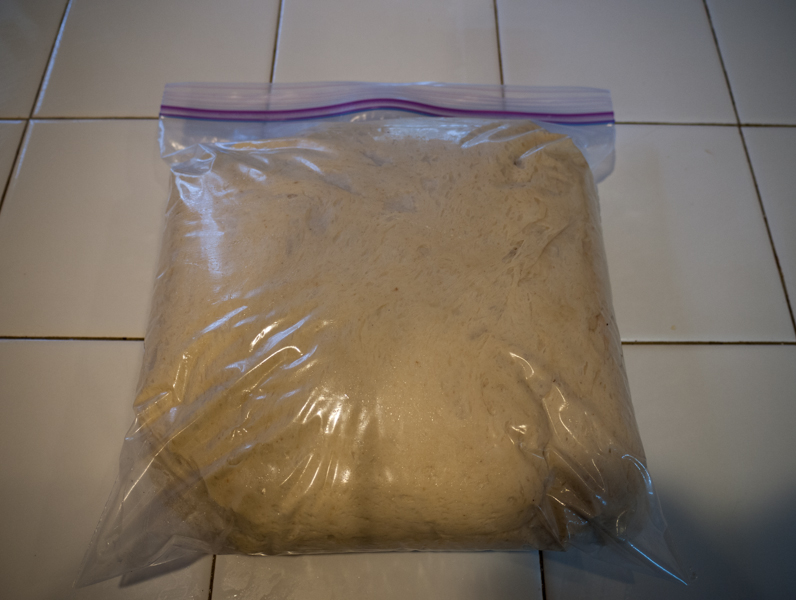
7. Transfer the dough to a plastic bag ( I used a heavy ziplock bag), and refrigerate for 2-3 hours.
8. When the time has almost passed, cut the butter into cubes and spread over a work surface. Dust with all-purpose flour.

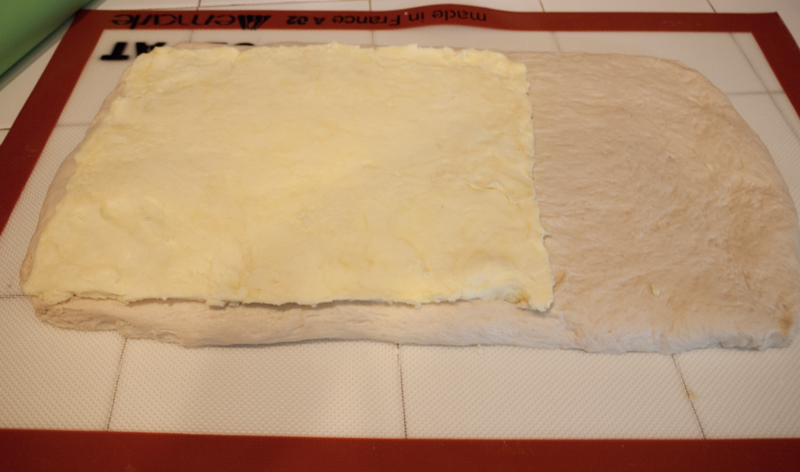
9. Bang the butter together using a rolling pin, until you have a cohesive mass. The flour should be worked into the butter, and help it have a softer consistency without getting warm. Form a 8″x12″ rectangle of the butter.

10. Keep the butter cool while you roll out the dough. Take it out of the plastic bag, and roll it to a 12″ x 20″ rectangle.


11. Place the butter on one end of the dough rectangle, so it covers 2/3 of it.
12. Fold the unbuttered piece of dough over 1/2 the butter, then fold over the last piece of dough and butter.


13. Turn the dough 90 degrees and roll it out to a 12″ x 20″ rectangle again. Fold the dough over in thirds again, like folding a letter.

14. Wrap the dough in parchment paper and refrigerate for 1 hour. The dough should be cold, but the butter should not harden, so don’t keep it there longer. If you have to, leave the dough out of the fridge for 15 min or so before working on it
15. Roll the dough out to 12″ x 20″ again, and do the letter fold. refrigerate for an hour again.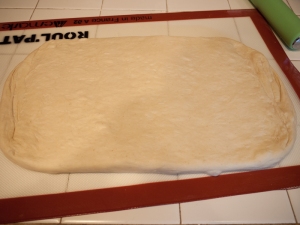
16. Do this once more – take out the dough, roll it out and fold it over.

17. Wrap the dough in parchment paper or plastic wrap, and place in the freezer for 1 to 2 hours. (If you want, the original recipes says you can wrap the dough in freezer proof wrap and leave for up to 3 days – let thaw overnight in the fridge before using).
18. Line to baking sheets with parchment paper. I used cookie sheets and they were too small – these are big croissants!
19. Roll the dough out to 18″ x 24″ and about 1/2″ thick.

20. Cut the rectangle in half lengthwise, creating 2 long, thin, ones.

21. Cut each rectangle into 4 parts, and cut each across to create 8 triangles.
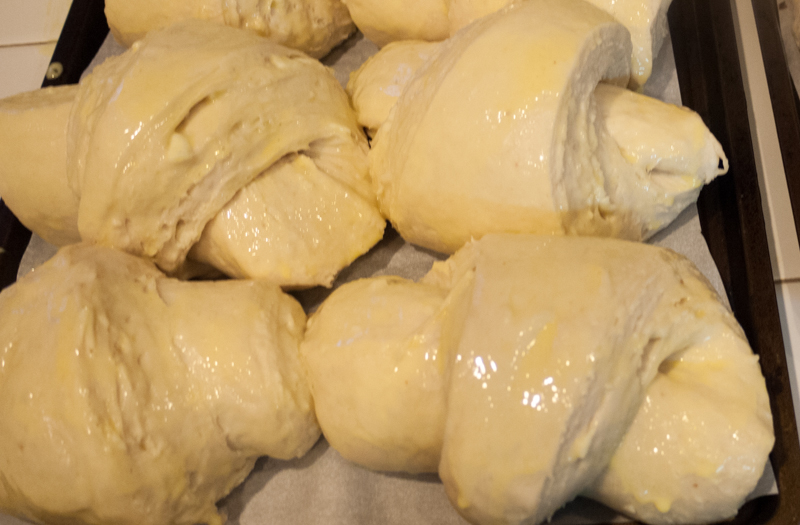
 22. Roll each triangle up and place on the prepared sheet.

23. Repeat with the second part of the dough.

24. You let these rise for 2 hours, or you can do as I did and cover with plastic wrap and retard in the fridge overnight – that way they are ready to be baked fresh for breakfast.
Day 3:
25. Take the croissants out of the refrigerator and preheat oven to 425 F.

26. Mix an egg with a bit of cream to make an egg wash, and brush over the croissants.
27. Bake for about 30 minutes, until golden and flakey.

I was really happy with the taste and flakeyness of these, it was worth the work – though it was a lot of work, or waiting, at least. The portion is HUGE though, it makes 16 very big croissants. Next time I might try to half or even quarter it, and maybe make them a little smaller.
The croissants were fantastic right out of the oven, pretty good the next day, and OK the third. I don’t think they would have been good to keep longer. We happened to be invited to a small gathering the evening of the day I baked these, so I gave the rest away for people to eat the next day – there was no way we could have eaten all of these by ourselves!


