Swedish Peasant Bread

bondebroed-15

My mom sometimes mails me random stuff she thinks I might find interesting, and a while ago she mailed me a Swedish flyer with some baking recipes. The flyer was publish by KF Provköket which seems to now be coop Provkök, a test kitchen for the retail cooperative coop. The flyer looks like it is published in 1985, and I could not find the recipes online.

Swedish is close to Danish, so I could easily figure out the recipes. The one that caught my eye was one for a whole grain ‘peasant bread’. It is using a scalding technique and is made with rye flour and some ground bitter orange (pomerans) rind. I find that quite a bit of Swedish bread is made with some sort of spices, and it is usually a nice touch. I did not, however, have any bitter orange rind or knew where to get it, so I decided to add some ground all-spice for some general complex spiciness, and that worked well.

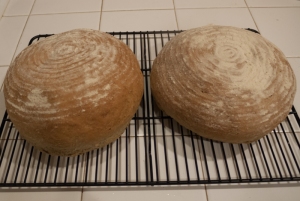
Though not required by the recipe, I used the opportunity to use my bannetons again, and the breads turned out beautiful.

Ingredients:

  • 500 ml boiling water (2.1 cups)
  • 500 ml whole grain rye flour (2.1 cups)
  • 1 tsp ground all-spice
  • 50 g butter (1.8 oz)
  • 250 ml water (1 cup)
  • 16.6 g active dry yeast (0.6 oz) (50 g fresh yeast cake)
  • 2 tsp salt
  • 1100 ml bread flour (4.6 cups)

Method:

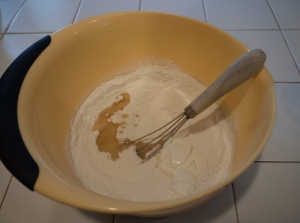
1. Mix this rye flour and all spice together in a bowl.

bondebroed-1

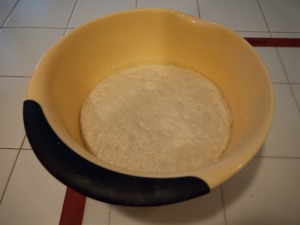
2. Pour boiling water over the mixture, cover with film and let stand for 2-4 hours (until a little warmer than room temperature).

bondebroed-2

3. Melt the butter and add the water. Let cool to 90 F/ 37 C.

4. Mix the yeast in the water/butter mixture.

bondebroed-3

5. Add the yeast, butter and water to the scalded flour and mix.

bondebroed-4

6. Mix the salt and gradually add almost all of the bread flour, and mix until a dough forms.

bondebroed-6

bondebroed-5

7. Knead lightly in the bowl for a few minutes.

bondebroed-7

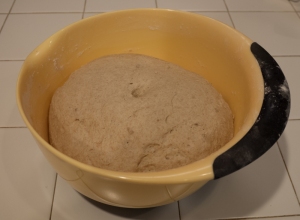
8. Cover with film and let rise for 45-60 min.

bondebroed-8

9. Turn the dough out on a work surface and knead lightly. Add more flour if necessary.

10. Divide dough in 2 and form 2 round breads.

bondebroed-9

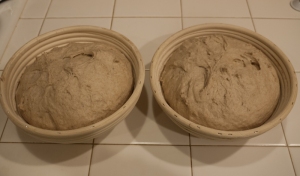
11. If using, dust 2 8-inch bannetons with rice flour and place the breads in them. Otherwise place breads on a parchment lined sheet.

bondebroed-10

12. Cover breads and let rest for 20-30 min.

bondebroed-11

13. Preheat oven to 200 C / 392 F.

14. Turn the breads out on a parchment lined sheet and transfer to oven.

bondebroed-12

15. Bake for 40-45 min, they are done when lightly brown and hollow sounding.

bondebroed-13

Since there is not much kneading involved, these are actually quite fast and easy to make. The scalding make it quite moist, and the spice and rye combination adds a lot of flavor. This bread is great still warm with butter, or as sandwich bread. I found it kept very well.

Pizza Stone Naan


naan-10After getting my pizza stone, I had the idea that it might be useful to bake Naan on, being closer to mimicking a Tandoor than baking on a sheet. Of course I am not the only one with this idea, and found this great recipe and video instructions on Manjula’s Kitchen.

I love Indian food, and having an Indian grocer around the corner means that it is quite easy to experiment with. I made these Naan to both Channa Masala and Saag Paneer, and they were great meals.

Ingredients: (original recipe on Manjula’s Kitchen)

  • 2 cups of all purpose flour (475 ml)
  • 3/4 cup lukewarm water (175 ml)
  • 1 tsp active dry yeast (10 g fresh yeast cake)
  • 1 tsp salt
  • 1 tsp sugar
  • pinch of baking soda
  • 2 tbsp oil
  • 2  1/2 tbsp plain yogurt
  • Nigella seeds for sprinkling (optional)
  • 1-2 tbsp butter, melted, for brushing (preferably clarified)

Method:

1. In a small bowl, dissolve the yeast in lukewarm water.

2. Mix the flour, sugar salt and baking soda in a larger bowl.

naan-1

3. Add oil and yogurt to the dry ingredients and mix it together

naan-2

naan-3

4. Add the water and yeast mixture and mix it in until a dough starts to form.

naan-4

5. Knead the dough until smooth, about 3-5 min. It is quite soft and sticky, that is OK.

naan-5

6. Put the dough in a bowl, cover and let rise for 3-4 hours until almost doubled. If you prefer, you can every 30 min or so, stretch the dough by taking the bottom of the dough and pulling it on top (gently to not remove air form the dough). It helps for the gluten, and I find it very useful with a wetter dough like this one.

naan-6

7. Place a pizza stone in your oven and preheat to 500° F/ 260° C for at least 30 minutes.

8. Knead the dough for a couple of minutes and divide into 6 parts.

9. Turn the oven to a high broil when you are ready to form the Naan.

10. Roll each piece of dough out to an oval or triangle.

11. If using, spread nigella seeds on top and use the rolling pin to roll them into the Naan.

naan-7

12. Place the Naan on your pizza stone, I could fit 3 at a time.

naan-8

13. Bake for 2-5 minutes, until risen and lightly browned.

14. Place on a wire rack and brush with melted butter or ghee (clarified butter).

naan-9

15. Repeat with the other Naan, letting the oven heat for about 5 min between each batch.

I think these are very tasty, easy, and beautiful, this is a great recipe.

Sourdough musings

Due to my latest sourdough experiment, I have been reading a bit about maintaining a sourdough starter.
In my original sources it said to keep the starter in the refrigiator and feed it every 3-4 days.

On a work trip to San Fransico my husband recently picked up the book Tartine Bread, which is an amazing book, though I have yet to try any of the recipes in it. I hope to review it a bit later, but he does spend some time discussing his experimentations (over years!) with sourdough starters.

There was a couple of things that stood out to me when reading about his sourdough.
The first thing was having a predictable feeding schedule, and feeding more often. His recommendation was every day, at the same time, with the same amount of flour water. This would lead to predictable yeast activity.
The second thing was discarding 80% of the starter every time it was fed, too keep it young and fresh, this should lead to a less sour sourdough.
Thirdly, he would keep it at 65-75 F. Two types of acids are formed in a sourdough, and the more sour one thrives better a lower temperatures.

I decided I would try modify my own sourdough caretaking based on this, but tweak it so it fit my baking. I don’t plan on baking sourdough that often, and I plan on use it for different things and in varying amounts (for the basic Tartine bread, only one table spoon is used to create a leaven before making the dough, then you use the leftover leaven as your new starter). It needed to work for my Danish Rye bread too, and I didn’t mind it would be a bit more sour maybe.

I will try to a) discard about half of it when feeding. b) Feed it every second day instead of less often, and with different time intervals in between. I can probably not achieve feeding on the same time every day, but I can try. c) Feed it a predictable amount of food, 50g bread flour, 50g rye and 100ml of water. I chose to use whole grain rye, as it fit the types of bread I would like to make, and I think it would give it a unique flavor.

I don’t have anywhere it would always be between 65 and 75 degrees. In the winter our house is usually colder at night, and in the summer hotter in the day. I will keep leaving it out after feeding it, and then store it in the fridge.

After only 2 times doing this, I noticed a lot more yeast activity in the starter. I fed it in the afternoon, and forgot to put it in the fridge by bedtime, and I think that might actually work well me – feed in the evening, leave out overnight.

I also discovered that having a lot more yeast activity does lead to a lot more gas being created – the lid of my patent jar came off with a loud pop! when I opened it. I will probably just cover it with some plastic wrap going forward, even though those jars are pretty solid!

We will see how this will work for the sourdough breads I would like to make. I definitely want to try the Tartine bread too, as well as some other things from his book.

Sour dough starter

I wanted to make Danish rye bread, which is a sour dough bread. I thought I would give making my own non-yeast starter a try, referencing the recipe for a chef starter in On Baking (a pastry textbook), as well as Camilla Plum’s (Danish TV chef – link is in Danish).In the end it turned out really well, and it was not difficult at all. It just requires a little time.

Ingredients:

  • 300 ml spring or filtered water
  • handful of organic blueberries or grapes
  • 150 g wheat flour
  • 150 g dark rye flour
  • 1 tsp honey

The On Baking recipe called for organic grapes, to help create the fermentation, but since I had none, I used organic blue berries; they worked well.

Camilla Plum’s version had honey/syrup and/or yogurt, I tried adding a little honey to help with fermentation too.

Since I wanted to make rye bread, I wanted to use half rye flour, but you can make it with any flour containing gluten.

Since tap water as chlorine in it which will kill the very small amount of yeast you will start with, it is recommended to use spring or filtered water. I suppose you could also have the water standing in the open a day or two – aeration will break down the chlorine.

Method:

Day 1:

Mix 50 g wheat flour, 50 g rye flour, 100 ml of water, the berries and honey in a small bowl. Cover tightly and keep a room temperature

Day 2:

Pick out the berries, and add another 50 g of each flour and 100 ml water. Mix vigoursly. Cover tightly and keep at room temperature

Day 3:

After 12-24 hours the mixture should be bubbly and smell sourly. Mix the last flour and water in.

After another 6-24 hours the mixture should be ready to use, all bubbly again.  I didn’t wait more than half a day, but ideally you should wait 24 hours I suppose.

Either use right away, or keep in a tightly locked container in the fridge.

When using the starter, always leave a little in your container, and add as much of your mixed, risen dough back to the starter as you took out.

Every 4 to 5 days, feed the starter a bit of flour and water and leave it at room temperature for 5-6 hours. This will keep the sour dough going until next time you bake.

Watch out – you now have something alive in your fridge!