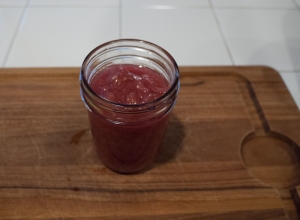
I know it now is way past rhubarb season, but I still want to share this jam I made this spring. I never got to post about it, so here goes. Save it for the next spring!
In Denmark, people usually make jam by adding Atamon (brand name for sodium benzoate) and have that and the acid and sugar in the jam conserve it. Here in the US, it is more common to sterilize the jars (in Denmark you would add a few drops of Atamon to swish around the jar before adding your jam) and then conserve them by boiling with sealing lids.
I think the latter is a little more work intensive, but you avoid any preservatives in your homemade jam, and I have yet a jar of jam to go bad.
I like my jam a little tart, and especially rhubarb jam can have a lot of tartness. If you like a sweeter jam, add a little more sugar. I realized I wanted to make my rhubarb jam with ginger after I had some rhubarb ginger ice cream at Molly Moon (Seattle’s favorite ice cream shop). It was so delicious, and of course there were lots of recipes for rhubarb ginger jam online. I looked at a few, and did what I thought was simplest.
Ingredients:
- 850 g rhubarb (2 lbs)
- 315 g sugar (2 cups)
- 2 tbsp grated ginger
- 3 tbsp low-sugar pectin
- 0.5 vanilla pod (optional)
- 50 ml of water (1/4 cup)
Method:
1. Chop up your rhubarb and grate the ginger.
2. Add rhubarb, ginger, sugar and pectin to a pot. Split your vanilla pod and scrape out the beans, add those and the pod to the pot. Pour over the water and put the pot on medium heat.
3. When the water start simmering, mix everything and turn down to a simmer. Keep simmering until the rhubarb pieces are broken up, about 15-20 min.
4. Meanwhile, wash all your jars, rings and lids.
5. Put the jars in a big pot of boiling water and boil for 10 min. You want to use a tall pot, where the water can go over jars while they are upright. this sterilizes the jars. Keep simmering.
6. Put your jars and lids in a small pot of simmering water.
7. Set out something heat and water (and jam!) proof.
8. When the jam is done, move it to where you will be pouring.
9. Lift up 1 jar at a time out of the simmering water, emptying it. Pour jam in, then add a lid and a ring. Remember to leave a bit space at the top, 1/4-1/2 inch (1-2 cm).
10. Do this with all your jam, then put your lidded jars back in the pot of simmering water. Make sure about an inch (3 cm) of water covers the jars.
11. Turn up to a boil and boil for 12 minutes.
12. Lift our your jars of jam to cool. When cool, the lids should not ‘pop’ when pushed, this means the sealing worked.
13. The jam can be stored for about a year, preferably in a dark place.
This turned out so yummy, it did not last a year for sure :). I used Kerr’s jars and lids, be sure to check instructions if you use something different. Also, if you live in high altitude, your times to seal and sterilize might be different.
You can make any type of jam you want like this. If the fruit is very acidic, you might not need as much pectin. If the fruit is very sweet, and not very acidic, I would lower the sugar even more and add lemon juice. I made some peach jam later in the season, and with this fruit to sugar ratio it still got very sweet (but very delicious).
If you don’t feel like sealing, you can pour the jam into clean jars, and then keep it in the refrigerator in 3 weeks or so.


