
Chocolate mousse is my favorite dessert. It is rich, decadent and perfect in every way. There are so many different recipes out there, and the main difference is usually whether you use both whipped cream and egg whites to create the fluffy texture, or just whipped cream, as well as the ratio of egg yolks and sugar to chocolate.
This recipe is my favorite, and it has a funny backstory. When we were students, one of my husbands classmates lived in an old dorm in Copenhagen, Kvinderegensen. It was build in 1931, and though today half of the residents are male, originally it was a girls only dorm.
The important part for this story, is though that they used to have great parties, including a spectacular New Years party, with a 4 course dinner and everyone dressing in fancy evening wear. We celebrated New Years there a couple of times, and one of the years the dessert was this amazing Chocolate Mousse with raspberry sauce and almond tuilles. I have a printout of email from 1998 from a guy I don’t know, to a guy I don’t know – but thank you Christoffer for writing down the recipe.
I usually don’t bother making the tuilles, but the raspberry sauce is super easy and really lifts the chocolate dish. (If I do make they tulles one day, I will be sure to post about it, but for now I don’t know if the recipe is even workable or not).
Ingredients, raspberry sauce:
- 200 g raspberries (fresh or frozen) (7 oz)
- 80 g sugar (2.8 oz)
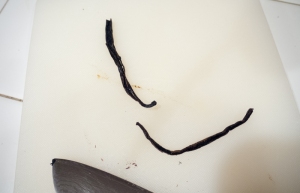
- 1/2 vanilla bean
Method:
1. Add the raspberries to a small pot.
2. Spit the vanilla bean and scrape out the seeds.
3. Add the vanilla seeds, bean (and empty bean from the chocolate mousse below) and sugar to the pot.

4. Put the pot on low on your stove, and let it simmer for 20-25 min.
5. Try not to stir with a spoon, but swirl the pot gently, this way the berries retain their shape.

6. Let stand for 30 min, then remove the vanilla beans.

7. Serve cold or luke-warm.
Ingredients, mousse:
- 200 g dark chocolate, minimum 60% chocolate (8 oz)
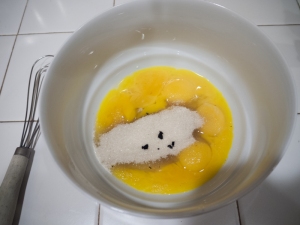
- 8 egg yolks*
- 70 g sugar (2.4 oz)
- 1/2 vanilla bean
- 500 ml heavy whipping cream (1 pint)
*Note: If you can, use yolks from pasteurized eggs. The yolks do not get heated, and the more yolks, the higher the risk of illnesses. If you are using regular eggs, make sure to keep the mousse refrigerated at all times.
Method:
1. Chop the chocolate finely, and melt it, either in a double boiler or the microwave.
2. Spilt the vanilla bean and scrape out the seeds. Save the empty bean for the raspberries.
3. Whisk the egg yolks with sugar and vanilla seeds.
4. Add 1/3 of the chocolate to the yolk mixture, and whisk until shiny, homogenous and a little heavy feeling.

5. Mix in the remaining chocolate.

6. In a separate bowl, whisk the cream until creamy. You don’t want it to be stiff and fluffy as whipped cream you would put on a pie, just until you can form soft peaks.

7. Mix 1/3 of the lightly whipped cream into the chocolate by carefully turning the mixture. You don’t want to whisk vigorously.

8. When the first part of the cream is mixed in, add the rest and gently fold it in. You want to be careful to not beat the air out of the cream.


9. Pour into individual serving glasses or a serving dish and refrigerate.

When serving, you can use a big spoon to create ‘eggs’ from the mousse if it was refrigerated in a large shallow dish. Simply draw the spoon along the surface to roll up the mousse and create a pretty presentation. I usually just let people serve themselves in chunks, but the other way does look better.
It is decently better once it has set, but you can actually make this and eat it almost right away. If you are having a chocolate mousse craving after dinner, as one might.
You can also add some rum or other spirit to the mousse (add it to the egg yolk/chocolate mixture before the whipped cream) if you want to have some contrast to the sweetness – it should not be boozy, just about a tablespoon or two.


